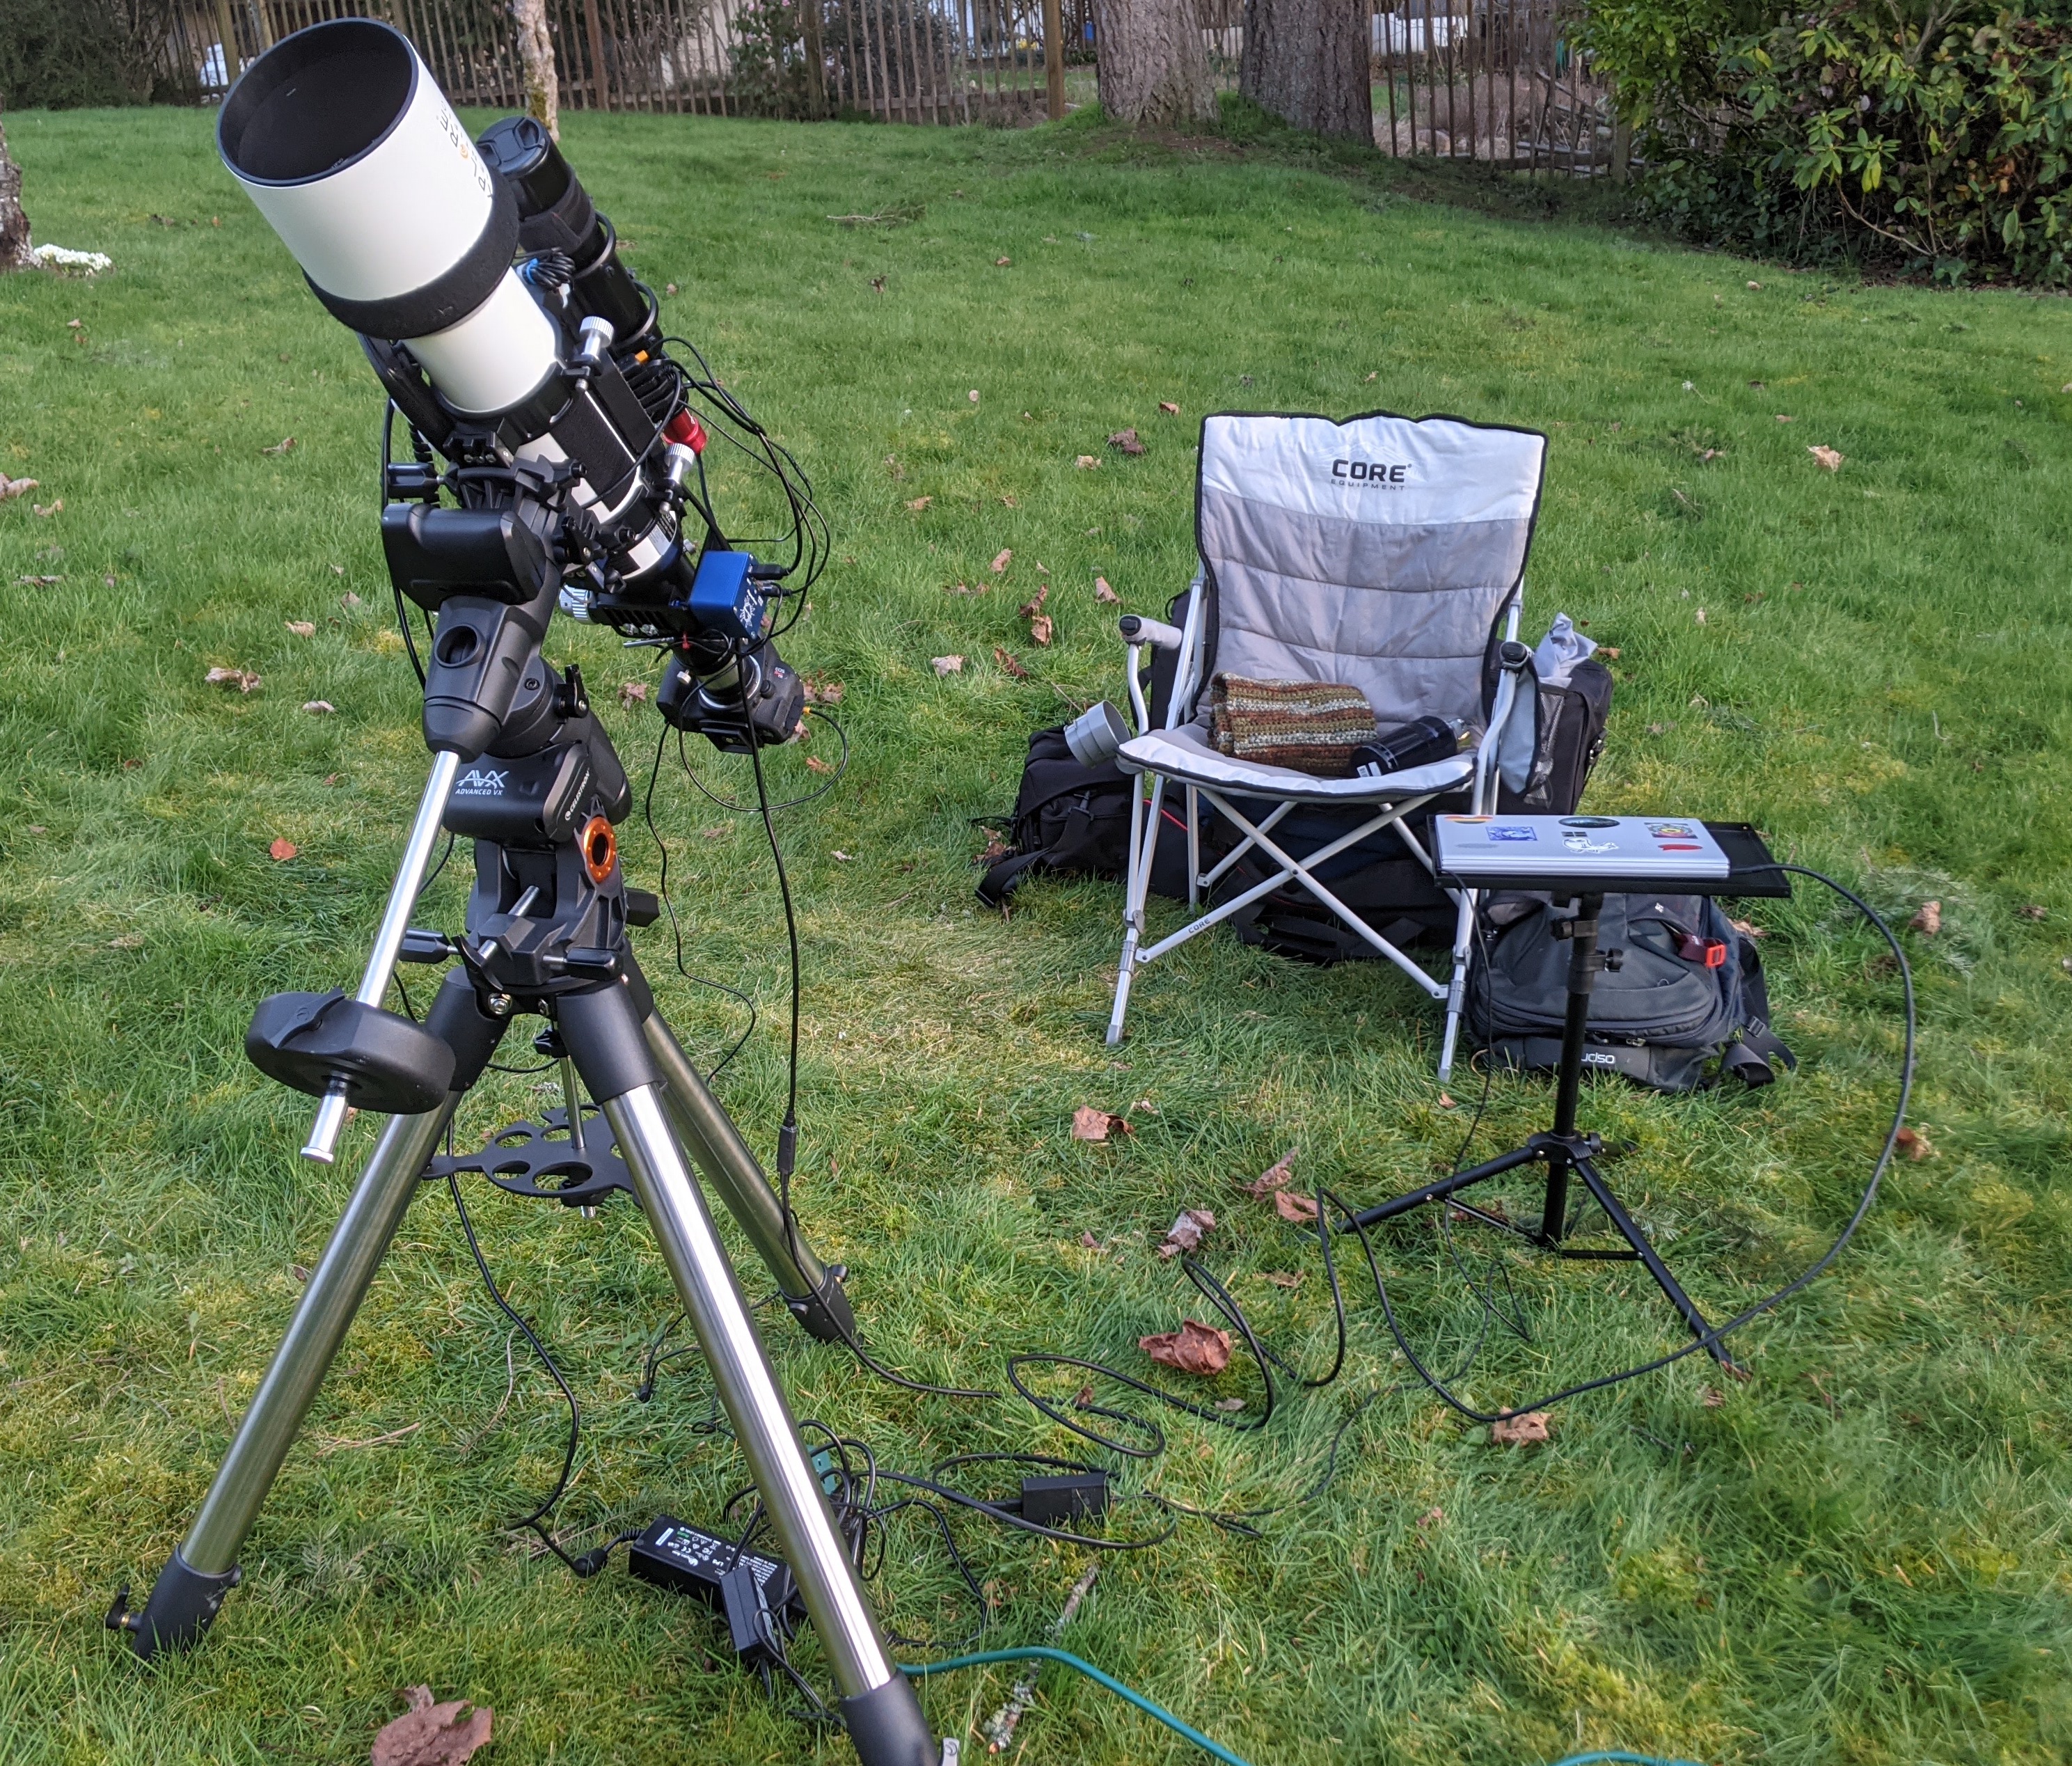
As with any kind of data-processing, which is what much of astrophotography is, “garbage in, garbage out”. If you start with poor data, there’s only so much you can do to clean up it into something that looks pretty, which means that good images start with good data. For me, that usually means setting up either in my yard or the observatory at the nearby park (Battle Point Park/Ritchie Obseravtory) and settling in for the night to get as many hours of data on my target of choice as possible.
I prefer to start setting up around an hour before sunset, not just so that I have some light to work with, but I also like to be able to take my flats using the sky instead of a lightbox, and by taking them at the start of the night I can easily identify if I have any large dust motes and do some lens cleaning before getting started. I use the flats calibration wizard in Sequence Generator Pro to get the exposures timed correctly. After I’ve got my flats taken, I’ll take some bias and dark frames as, and then once it’s dark enough that I can get a successful plate solve from my guide camera it’s time to start polar alignment.
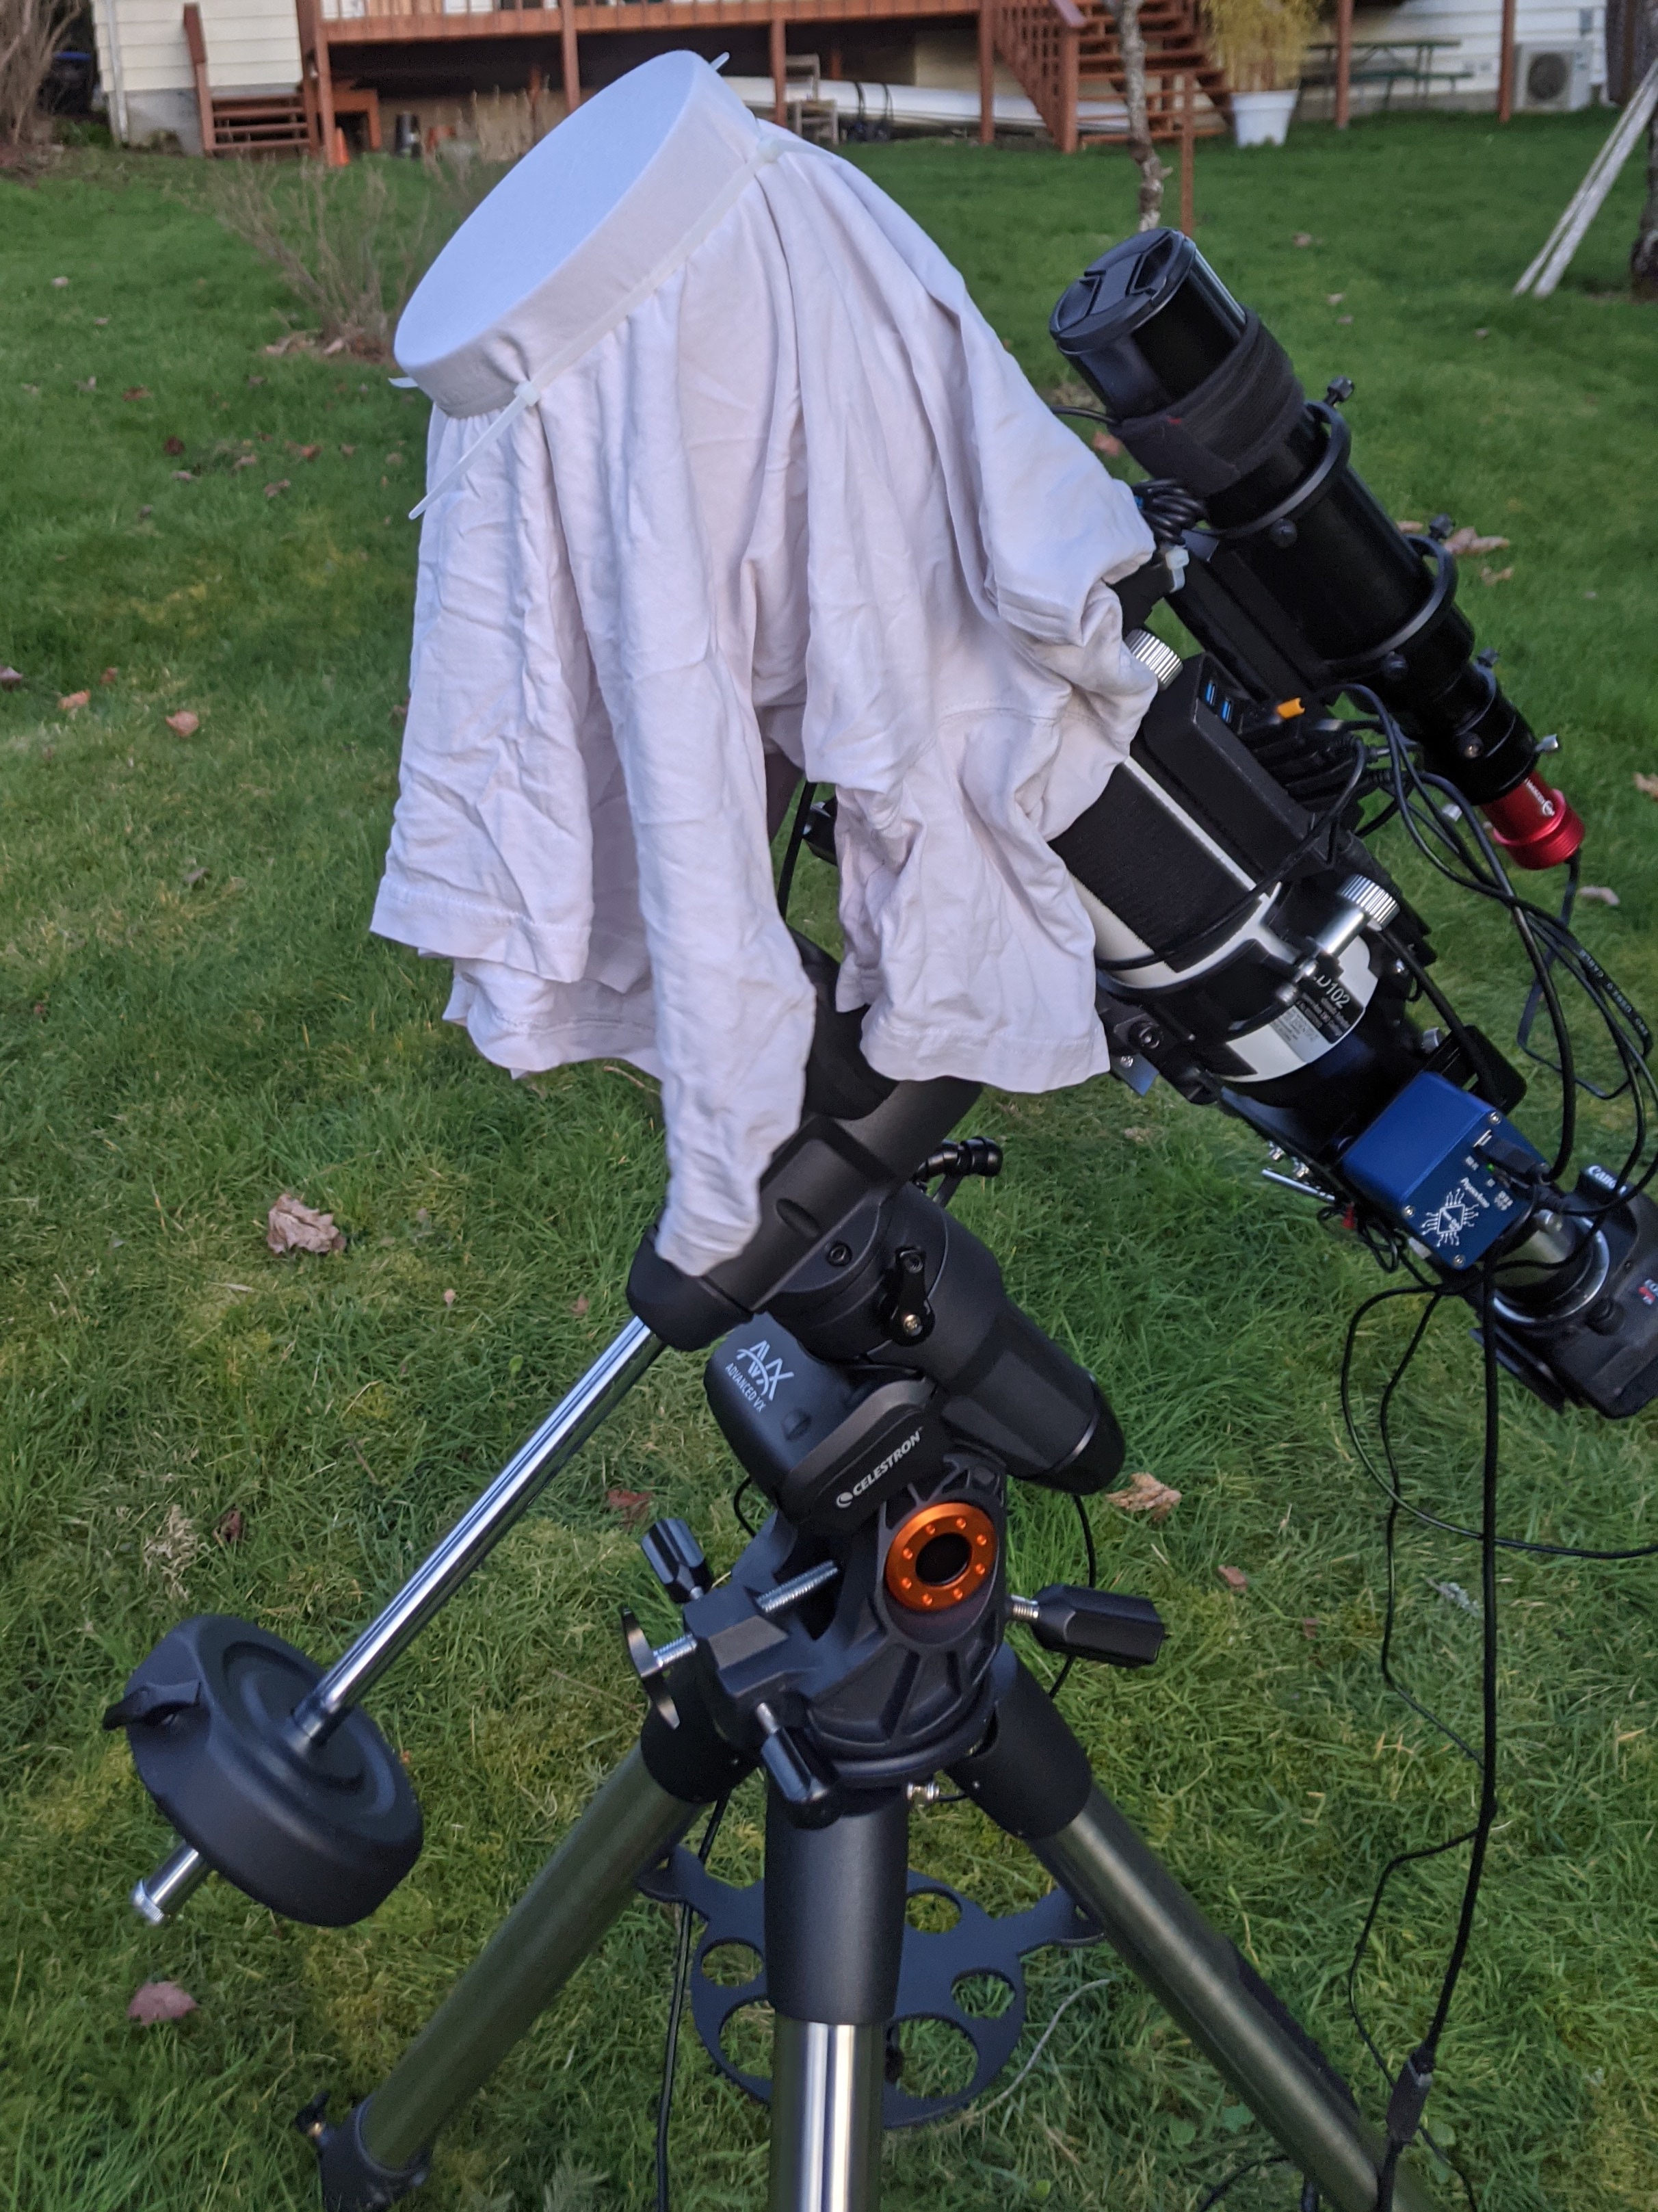
Scope setup for taking sky-flats with a white t-shirt acting as a diffusor.
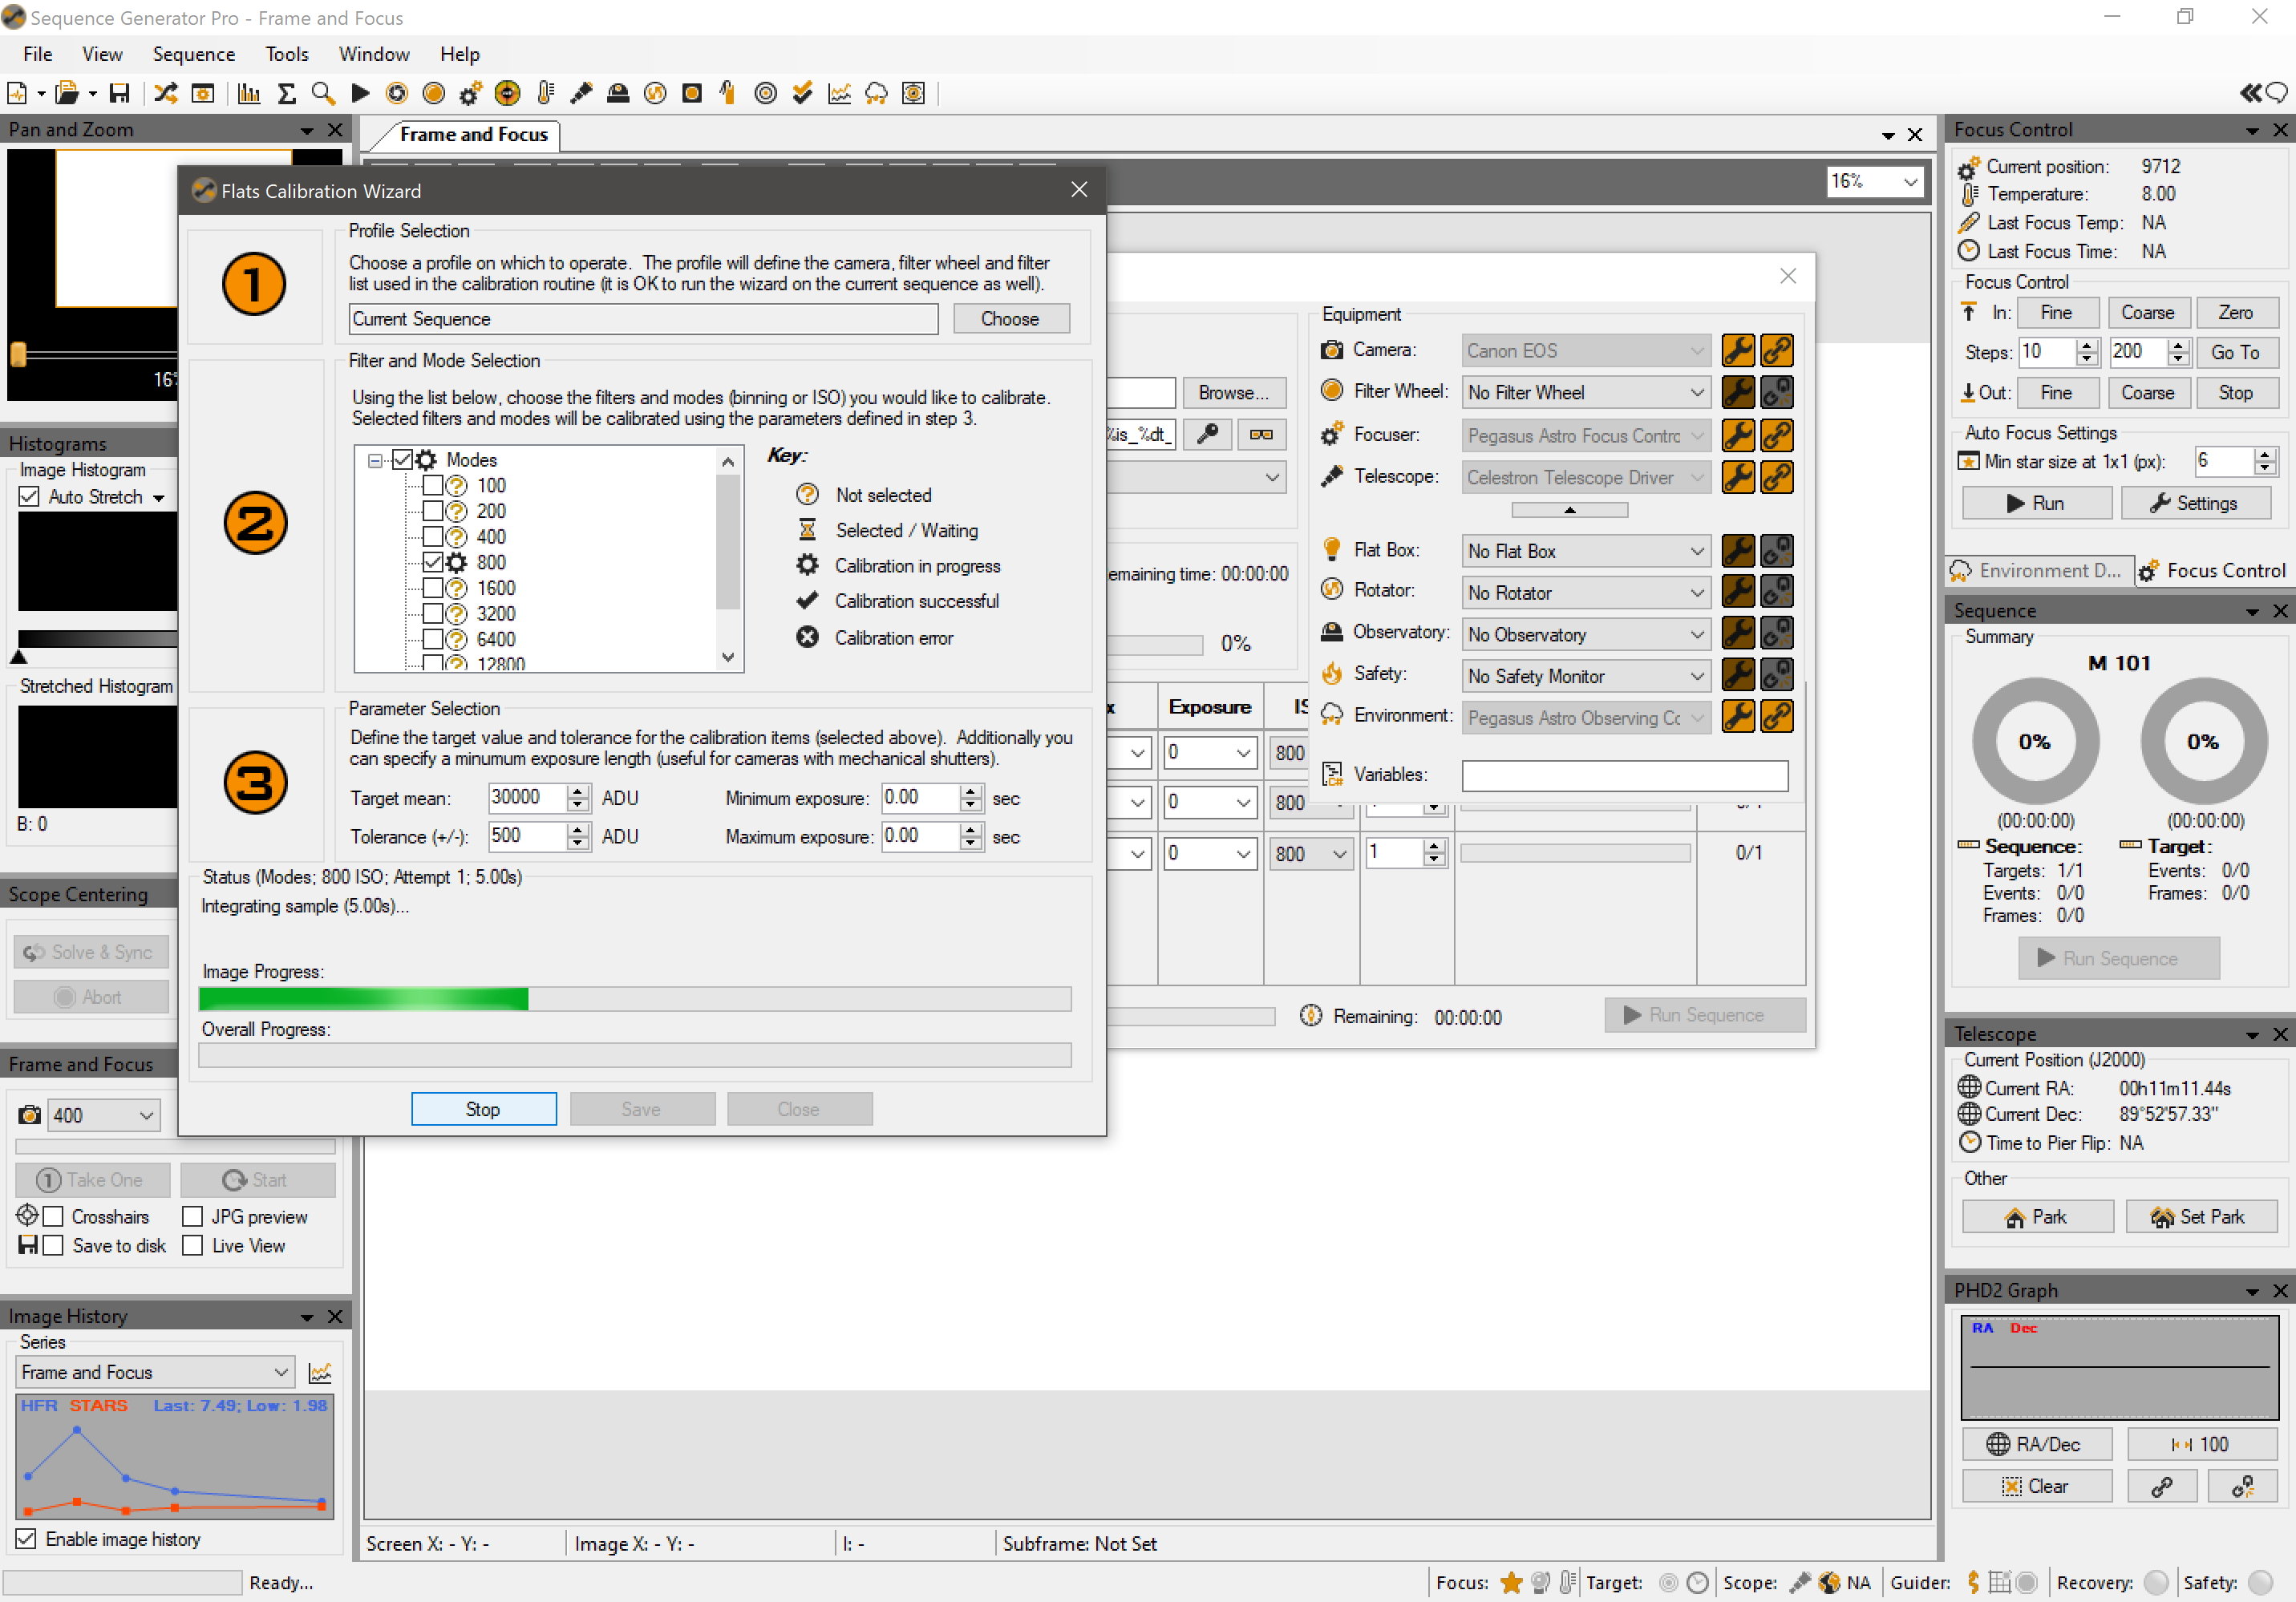
The flats calibration wizard takes a few sample exposures and calculates their average ADU until it finds the right setting for an illuminated field without any clipping.
By this point, I’ll have my scope setup as level as possible (I’ve had good results using a level app on my phone, which lets me get within a degree of level and makes it a bit easier to figure out the right leg adjustments to make to get there) and pointed as close to north as possible. From there, I use the polar alignment routine within SharpCap and my auto-guider to dial things in further.

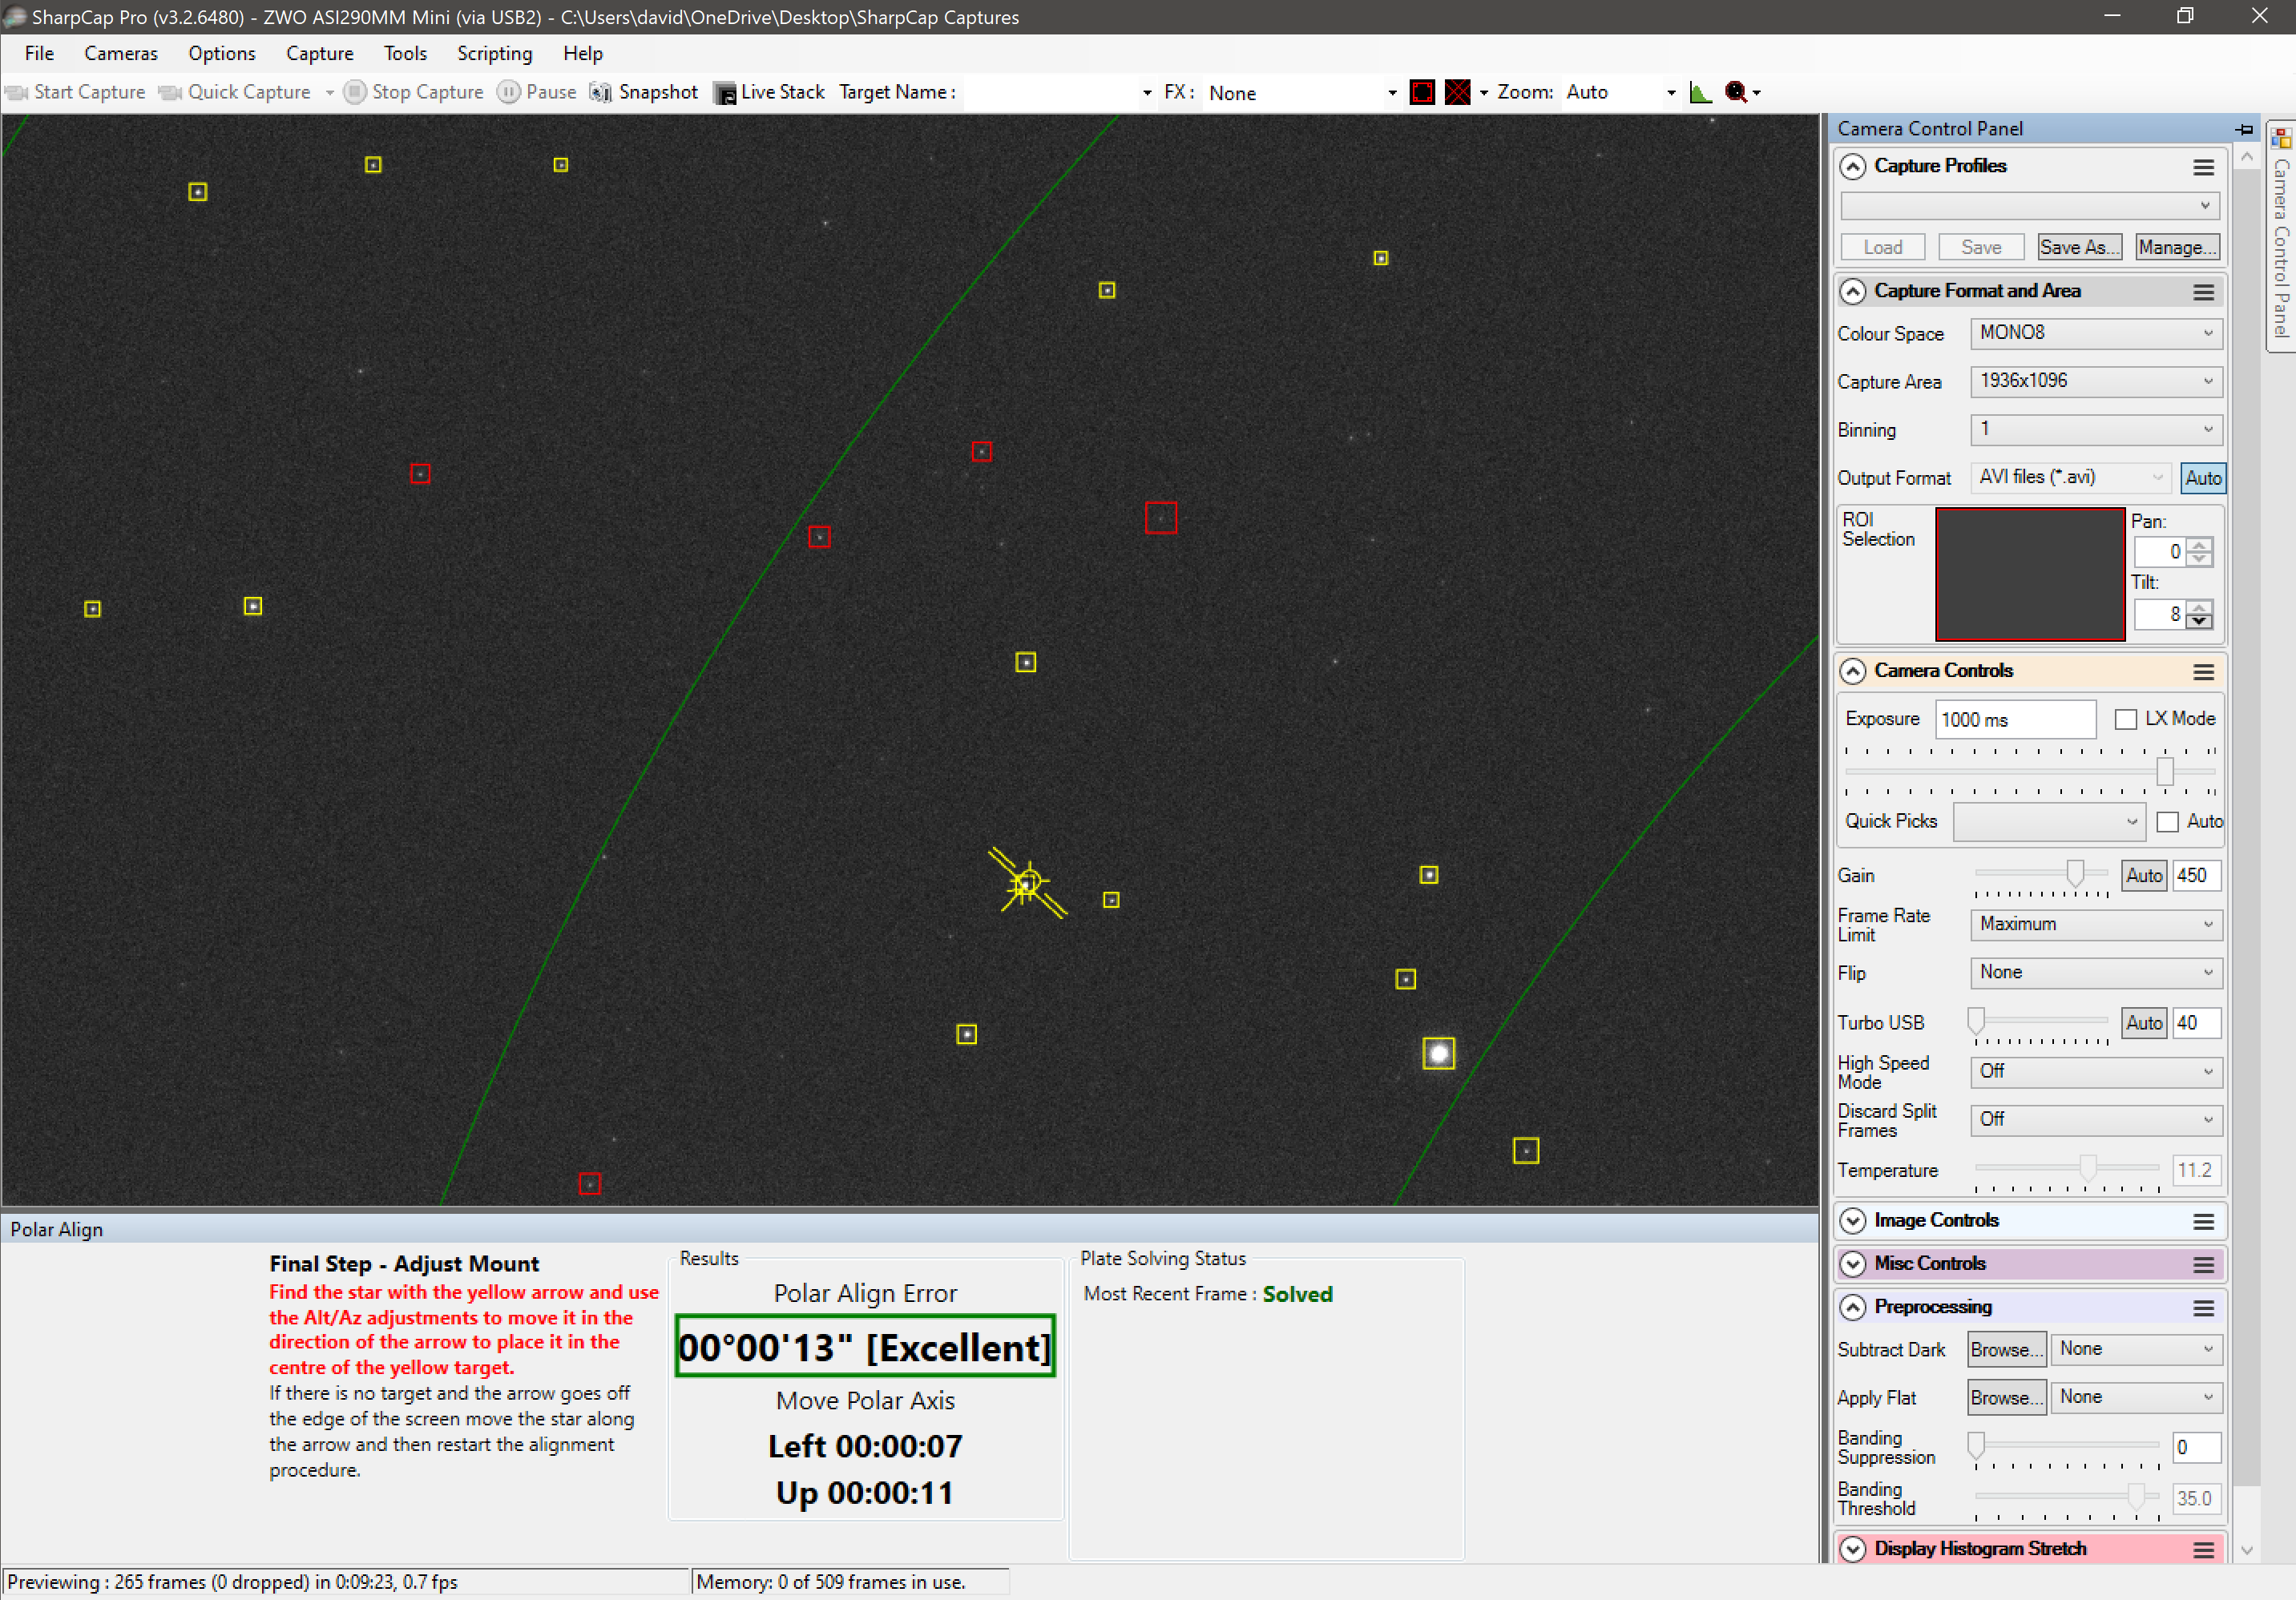
Initial alignment error, before corrections.
Alignment error after corrections.
The polar alignment routine within SharpCap operates by taking an initial photo close enough to the celestial pole for a successful plate solve (I have ASTAP and their full star database installed locally for this part), and then having you rotate (manually, after unlocking your clutch) your telescope at least 90 degrees through the right ascension axis and then doing another plate solve. This allows it to determine the center of rotation and from there calculate how far out of alignment you are and provides an interactive guide for correction (more detail can be found in their documentation). I try to keep my exposure time at no more than 1 second, which allows for reasonably quick feedback when making adjustments. Atmospheric conditions, mount tolerances and guide camera pixel size all present limiting factors for alignment accuracy, but I’ve personally had good results and the process usually only takes about 10 minutes.
Once aligned, I disconnect from my guide camera in SharpCap and tab out (will come back to it later for live stacking) open up the rest of my software: PHD2, Pegasus Powerbox GUI (since it needs to be running in order for SGP to connect to it as an environmental data source), Cartes du Ciel (for looking up targets and coordinates), and Celestron NexRemote (for slightly better mount control than using the hand-controller directly via USB). I’ll connect my equipment in PHD2 and make sure that I’ve got a good calibration (I’ll re-run calibration if I’m setting up in a different location, or if I’m not confident that I’m correctly leveled). Then it’s back over to SGP for auto-focusing and starting my sequence. Before starting the initial auto-focus routine I’ll slew to the approximate area of some target nearby where I plan on shooting.
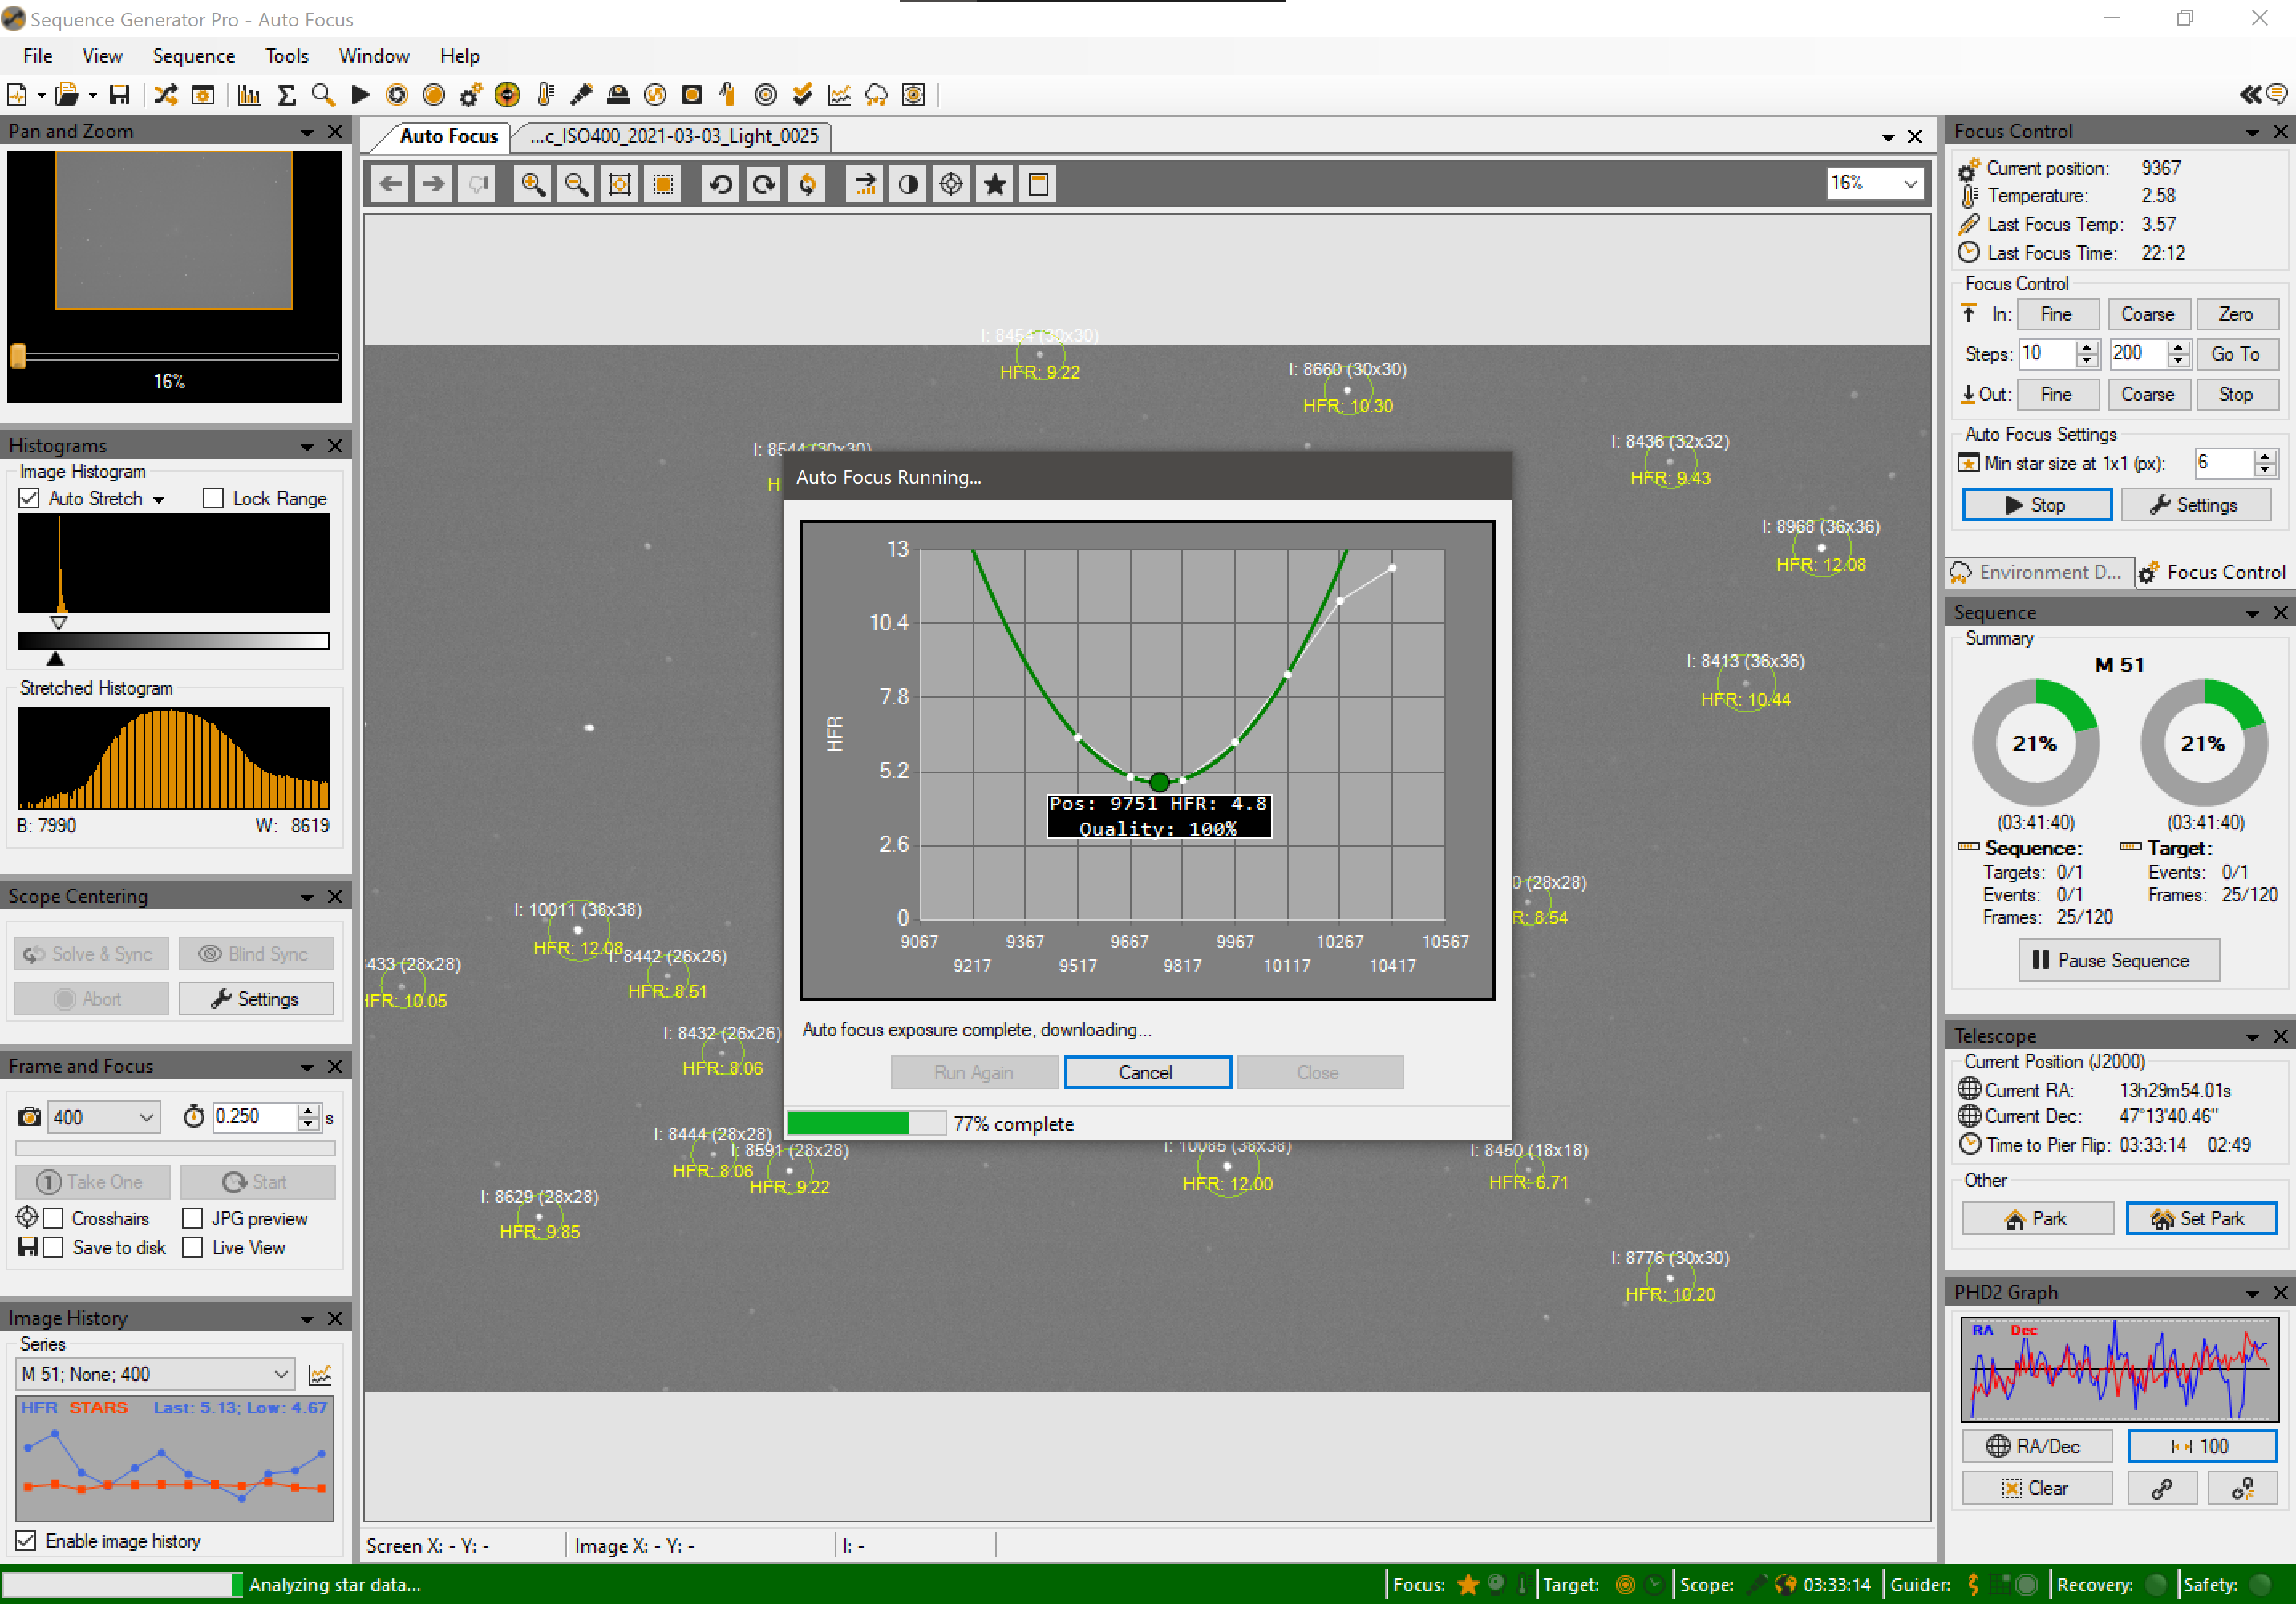
Completed auto-focus routine in SGP. A series of exposures analyzed for star detection and half-flux radius are used to perform a polynomial regression in order to determine the focuser position to bring stars into the tightest focus.
At this stage, the pretty much the only things left are to make sure that I have my target coordinates and capture settings configured in my sequence, pointing the scope and letting it run. Target selection is worth its own post, but once I’ve chosen my target(s) for the night and know how many exposures I’ll have time to take there are plenty of tools or websites that will provide the J2000 coordinates that SGP needs for pointing. Since I’m already pointing somewhere in the general area of the sky as my first intended target, I like to go ahead and use the solve & sync function in SGP to do a plate solve and push that to my mount for calibration. With that done, I go ahead and start my sequence (which will go through another plate solve to make sure the target is centered within 50 pixels).
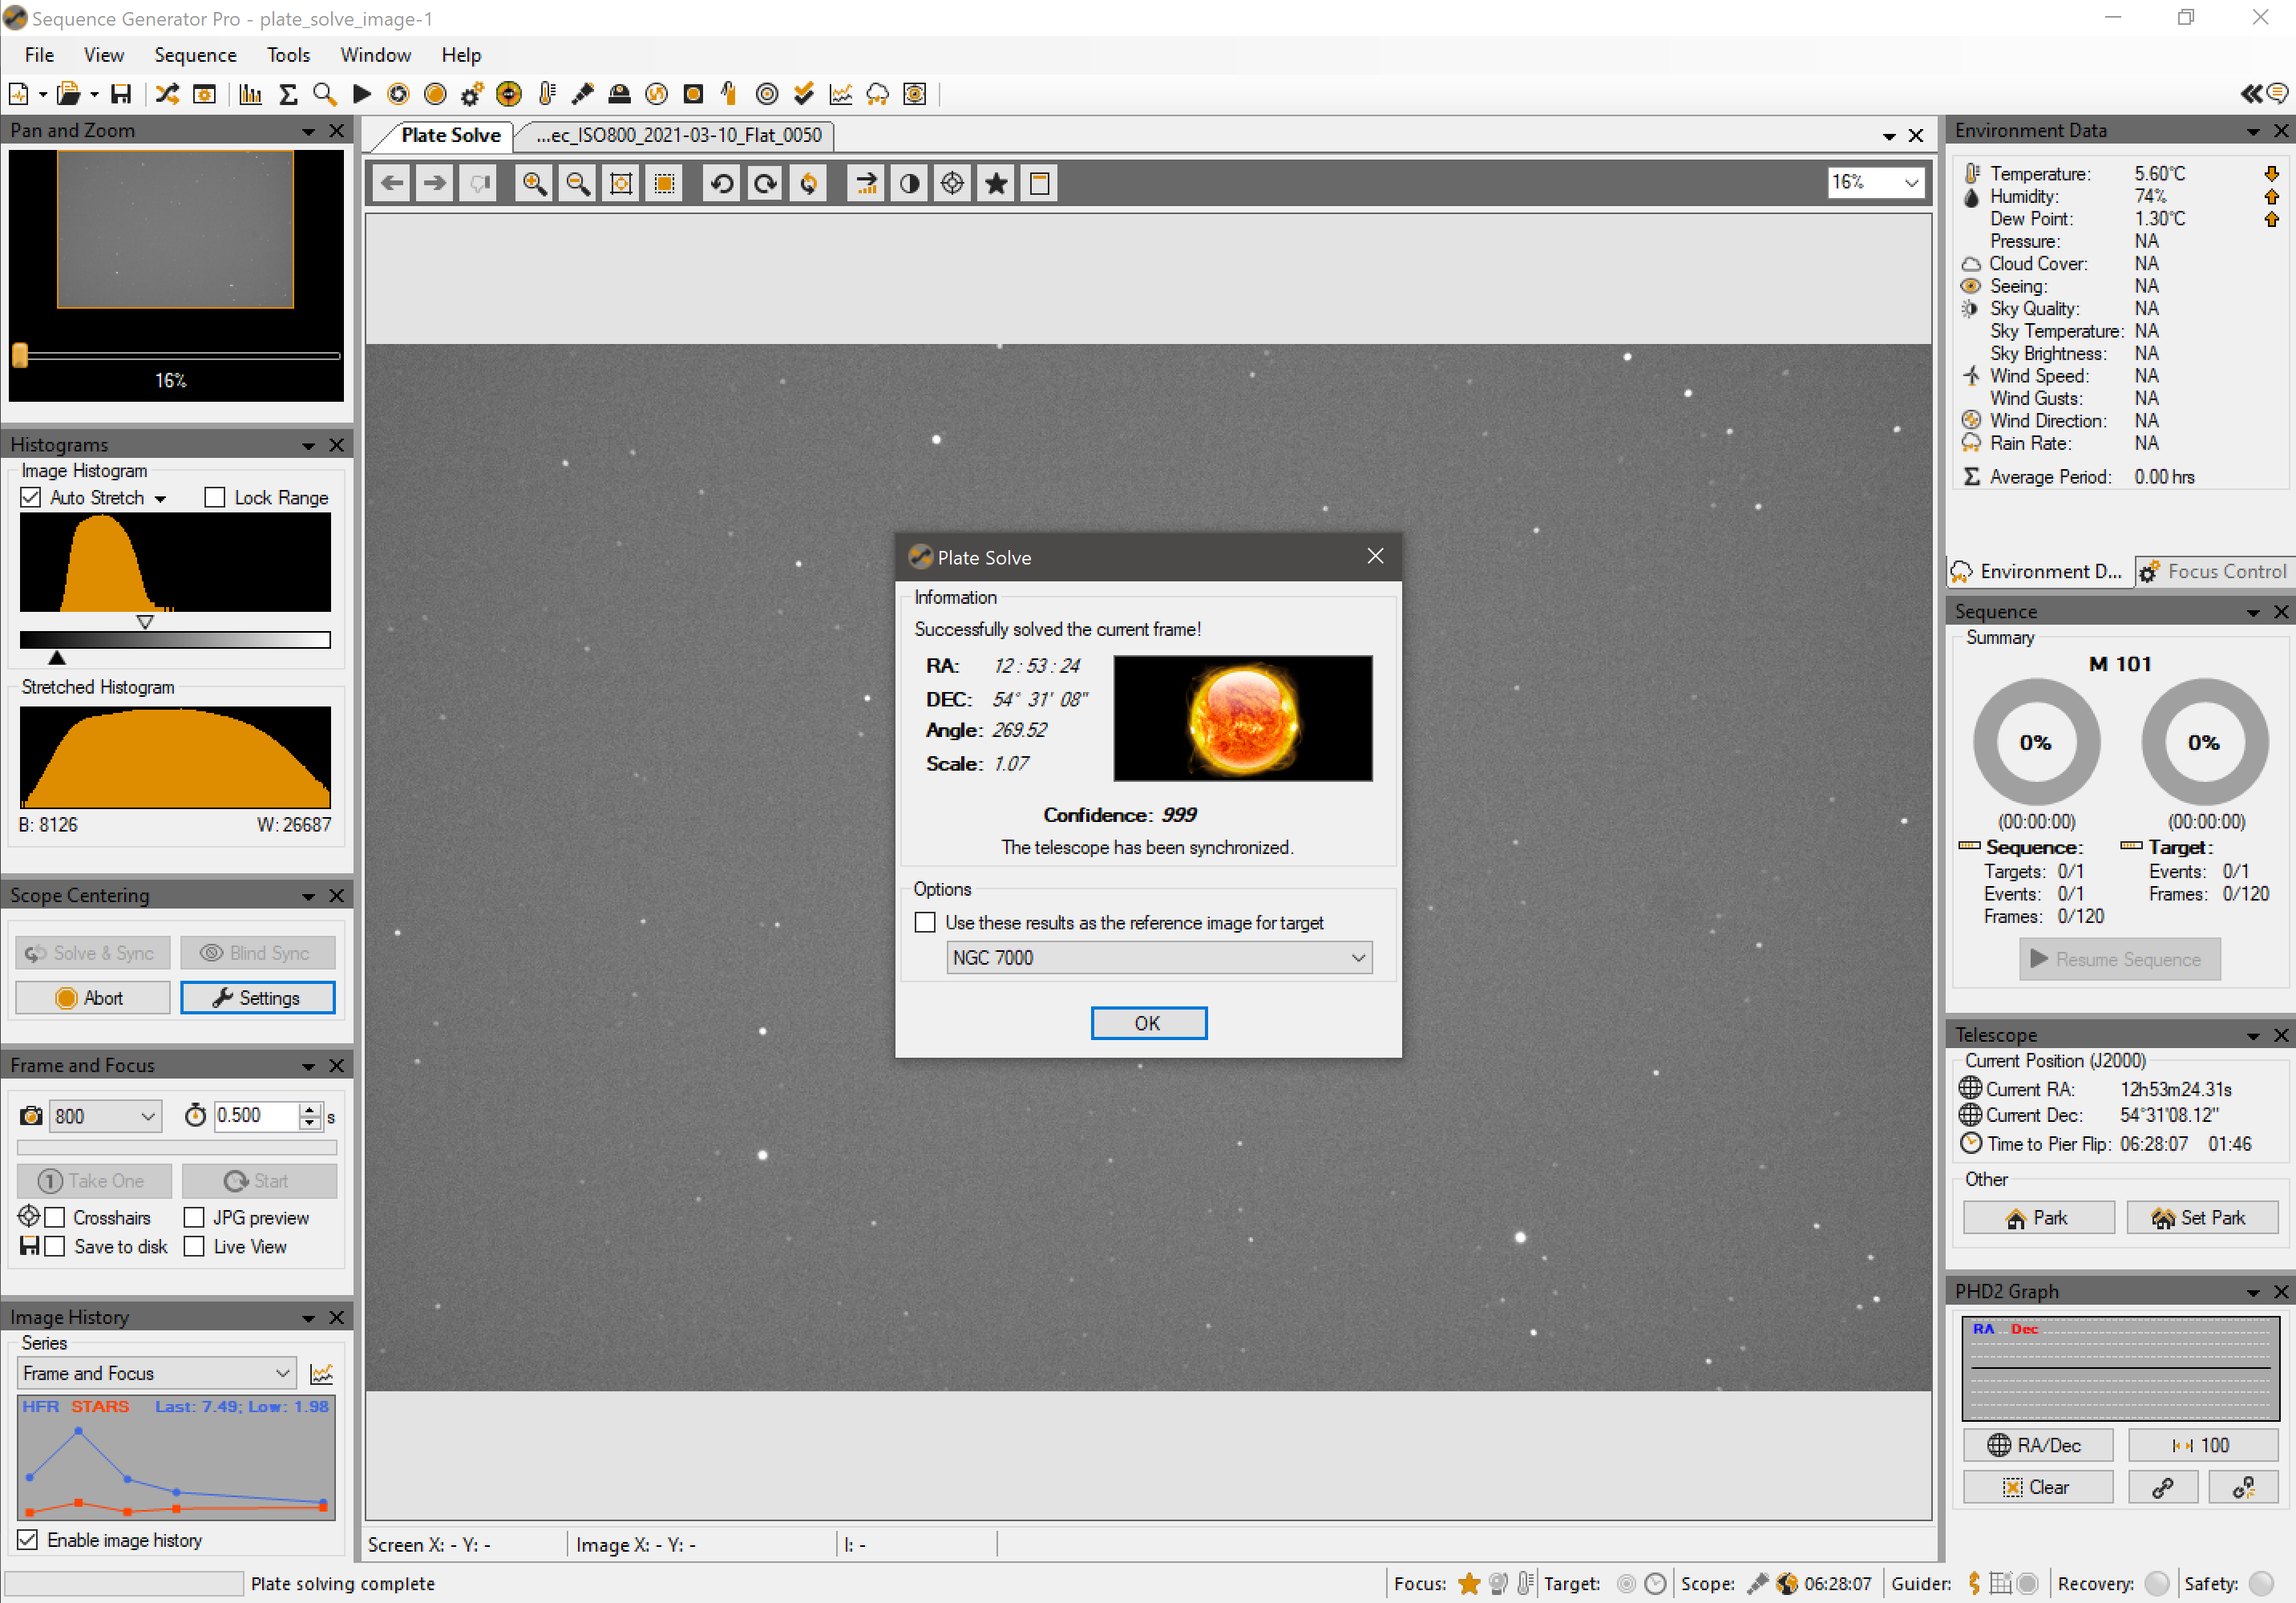
Plate solving and synchronizing within SGP replaces the longer and more cumbersome process of a multi-star mount calibration.
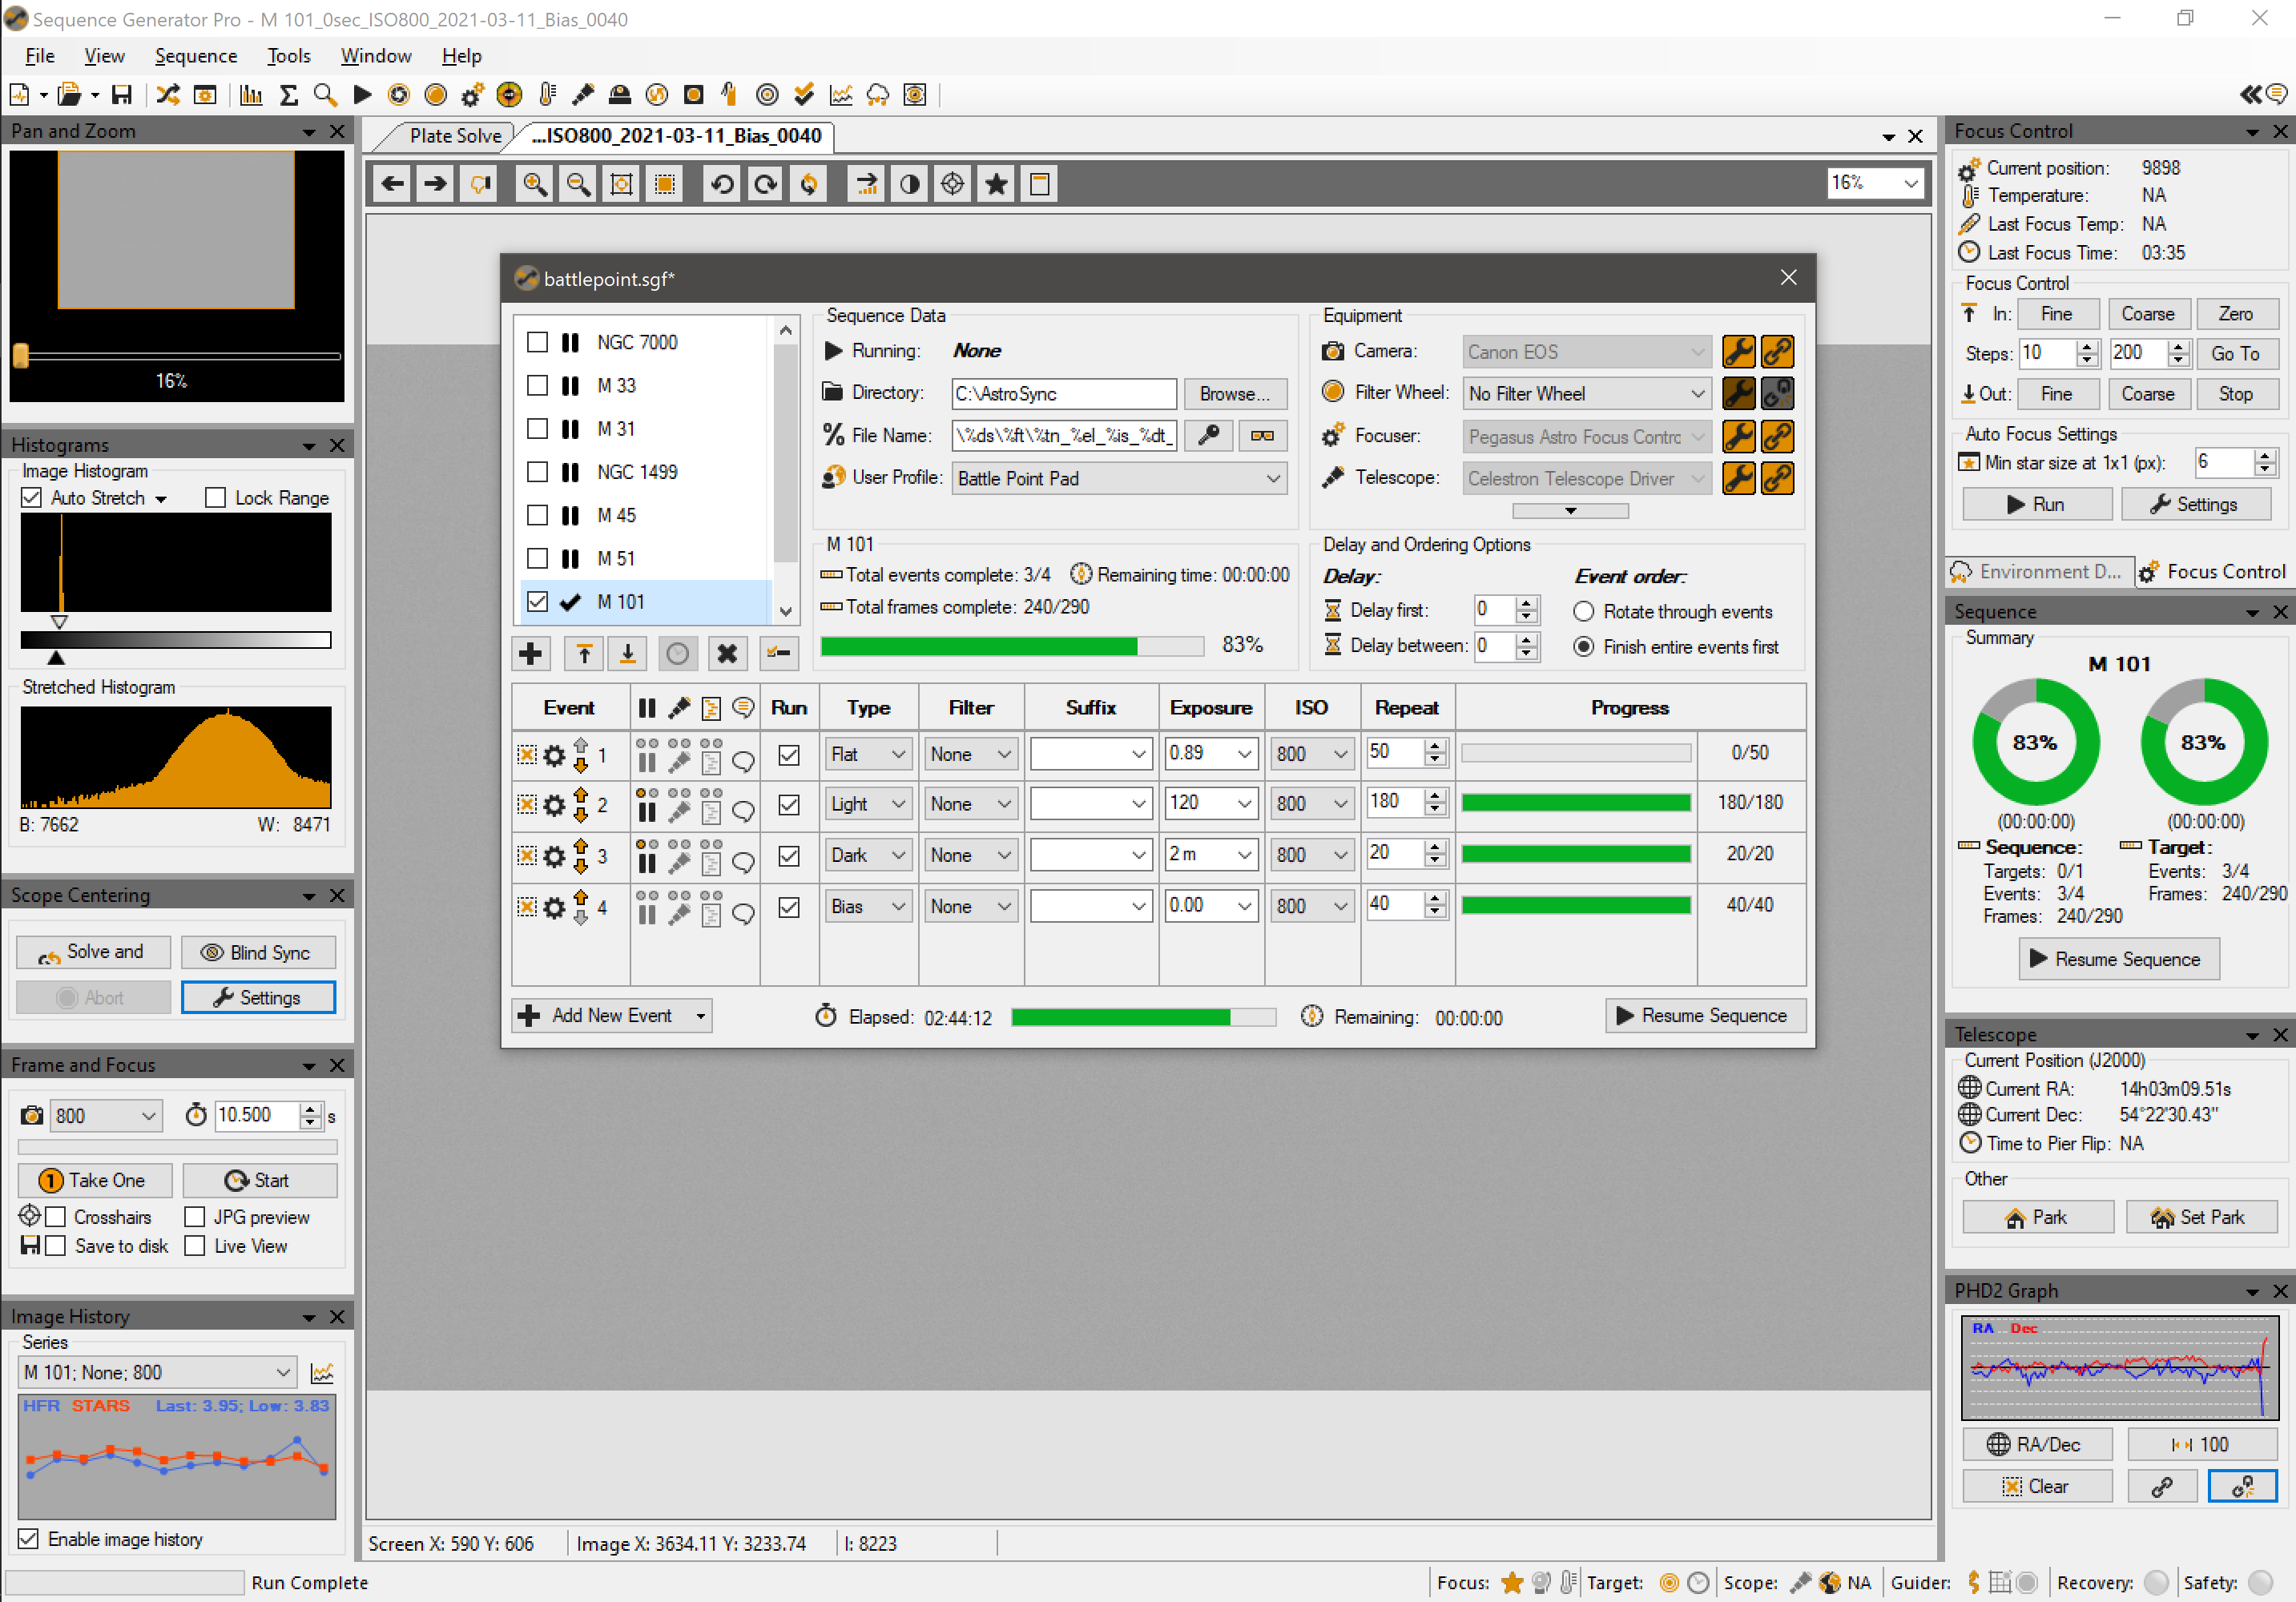
The sequencer in SGP provides solid automation controls for multiple targets and capture types, with options for pre & post stage prompts and script exeuction.
Once my first captures start getting saved to disk, it’s time to switch back over to SharpCap and connect the folder-monitor camera and point it to the directory that SGP is saving light frames to. This lets me use the live-stacking process, allowing me to get a rough integration during the night. This helps me make sure that everything is working correctly and that I’m gathering good data and its also nice to get to see the target slowly develop more detail as captures roll in.
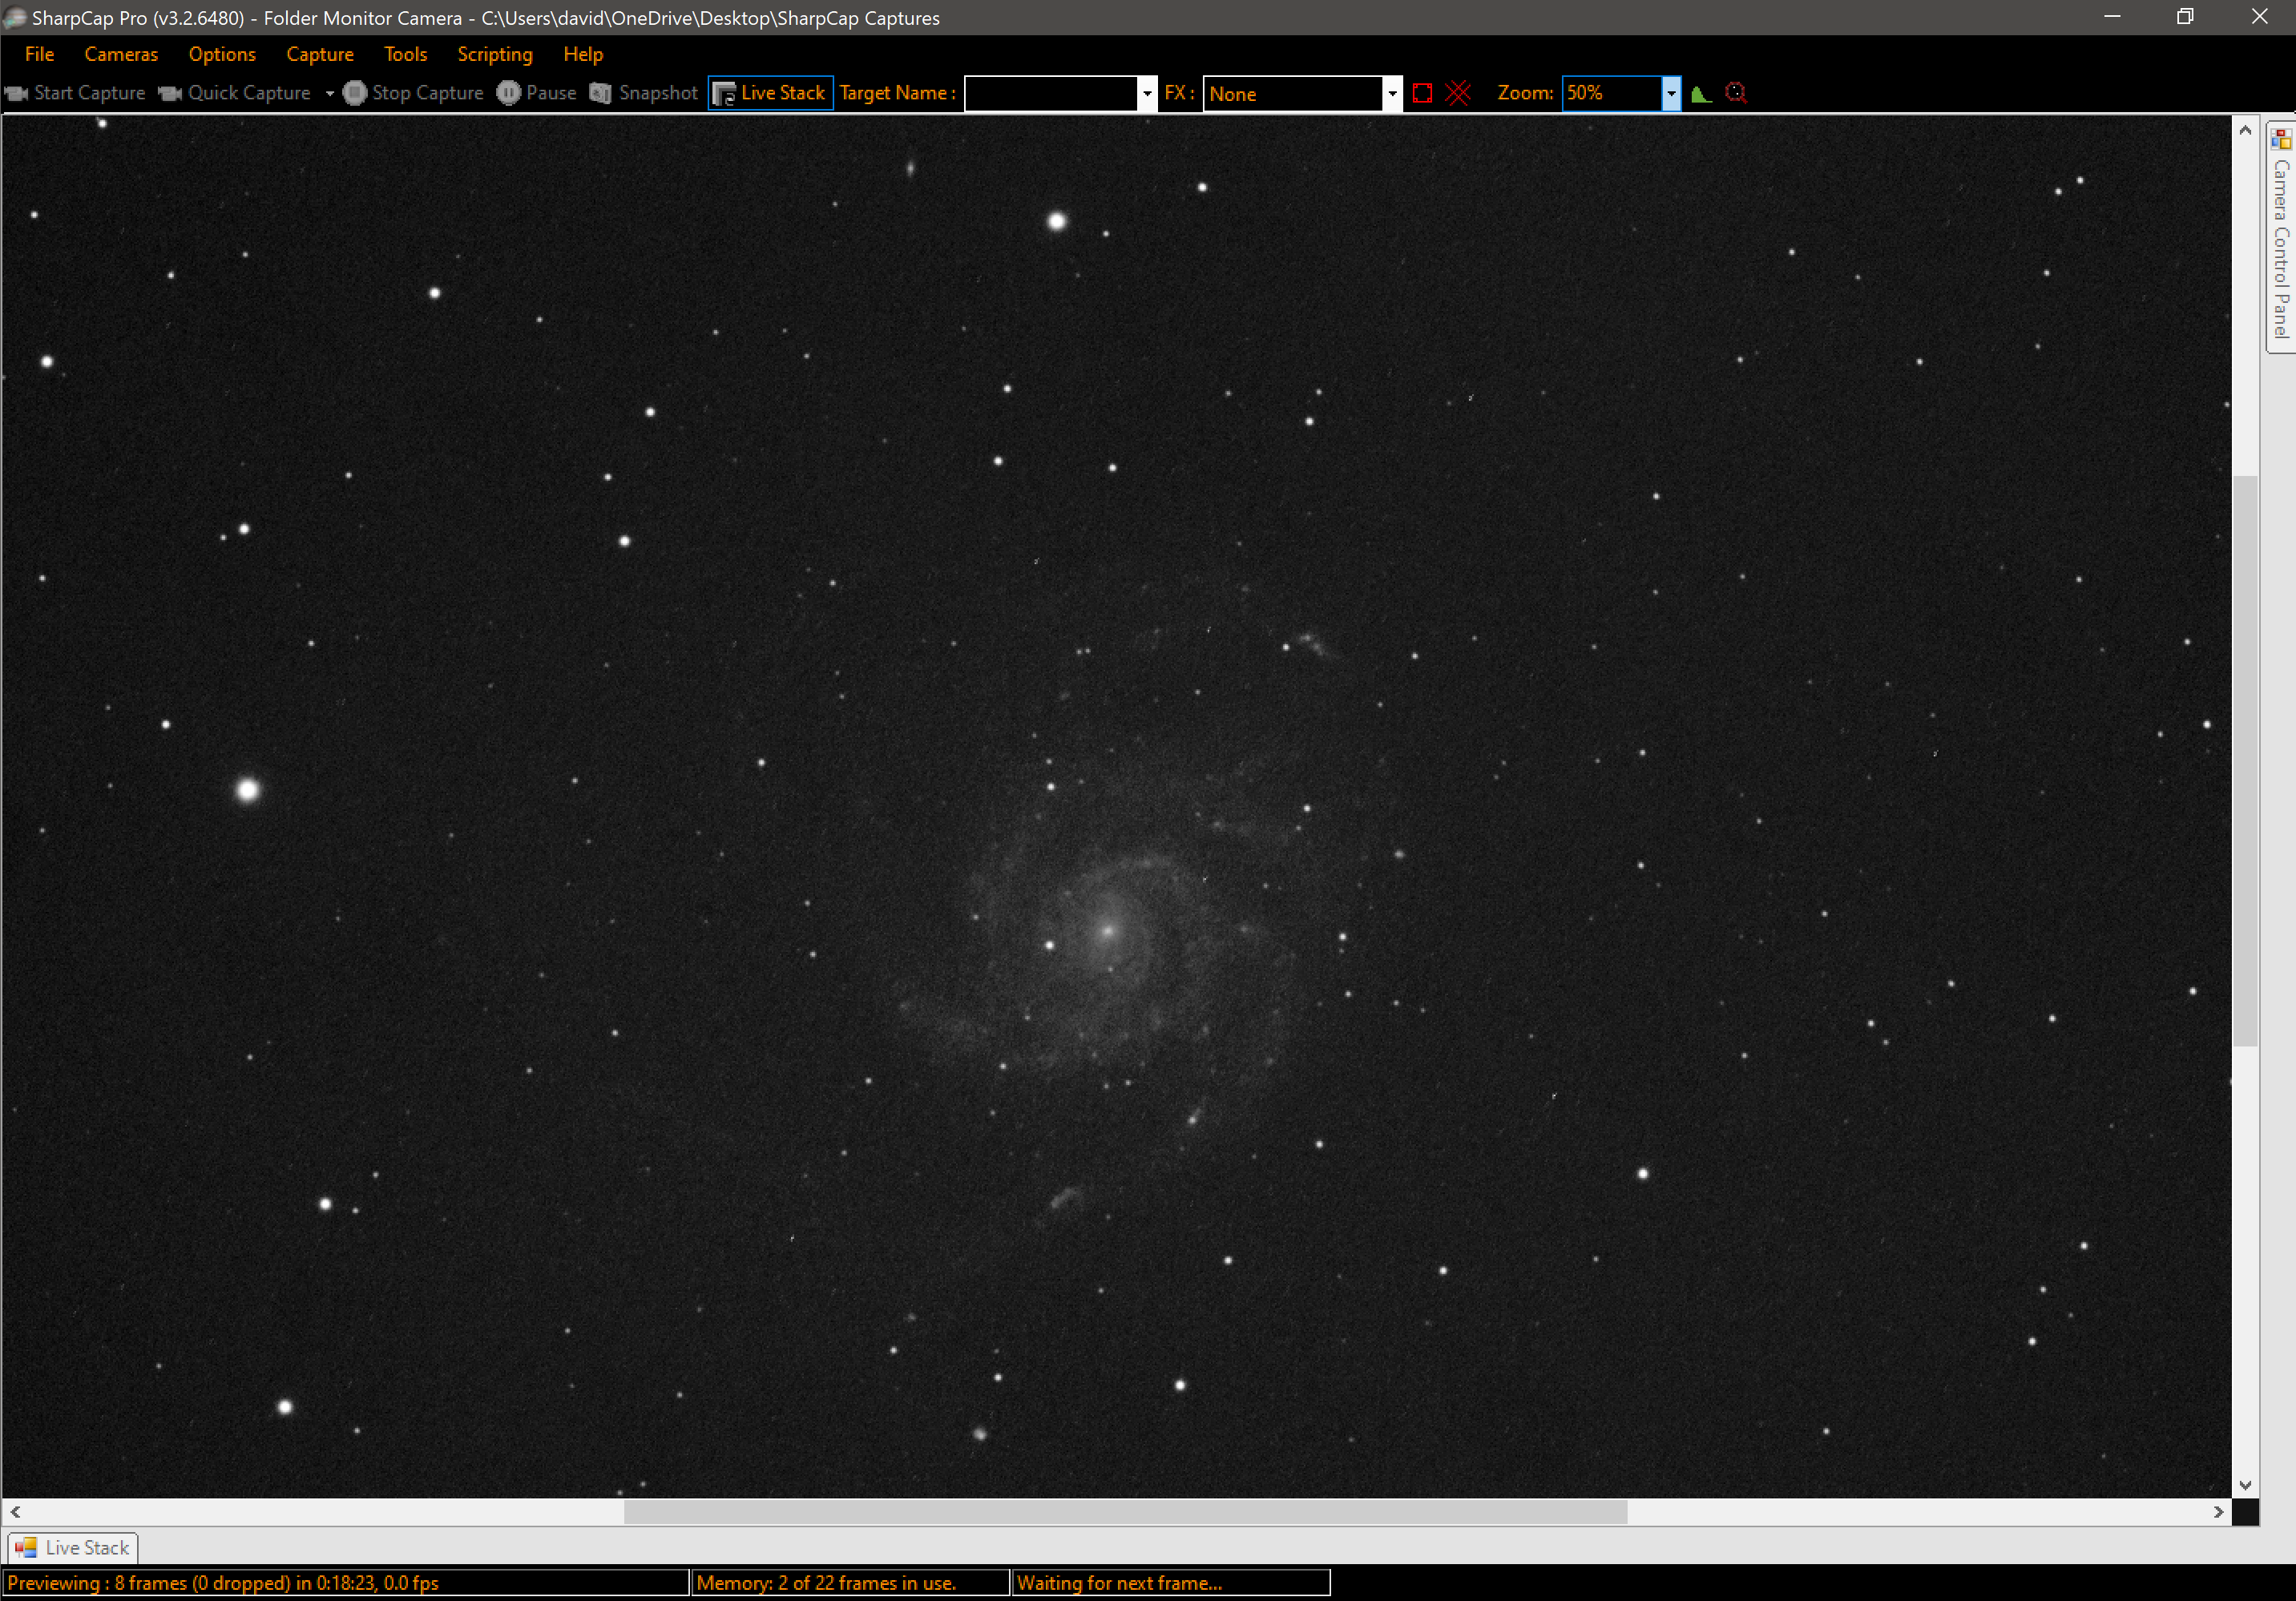
The live-stacking feature of SharpCap, combined with the folder-monitor camera, is my personal favorite for generating a live progress view on the night of capture. Deepskystacker Live can also produce a good result but its histogram stretching controls aren’t very good. Video-astronomy tools like Mallincam have significantly more features to produce a higher quality live-stacked image, but aren’t available for use with all camera hardware.
In addition to watching the live stack, I like to keep an eye on the auto-guiding graphs in PHD2 to make sure that I’m not having any significant tracking or guiding issues. Lastly, the history tool in SGP provides a useful view of image statistics that can sometimes be useful. Sometimes I will use Deepskystacker Live in addition to SharpCap for the image quality graphs that it provides, in particular for the view of sky background quality throughout the night.
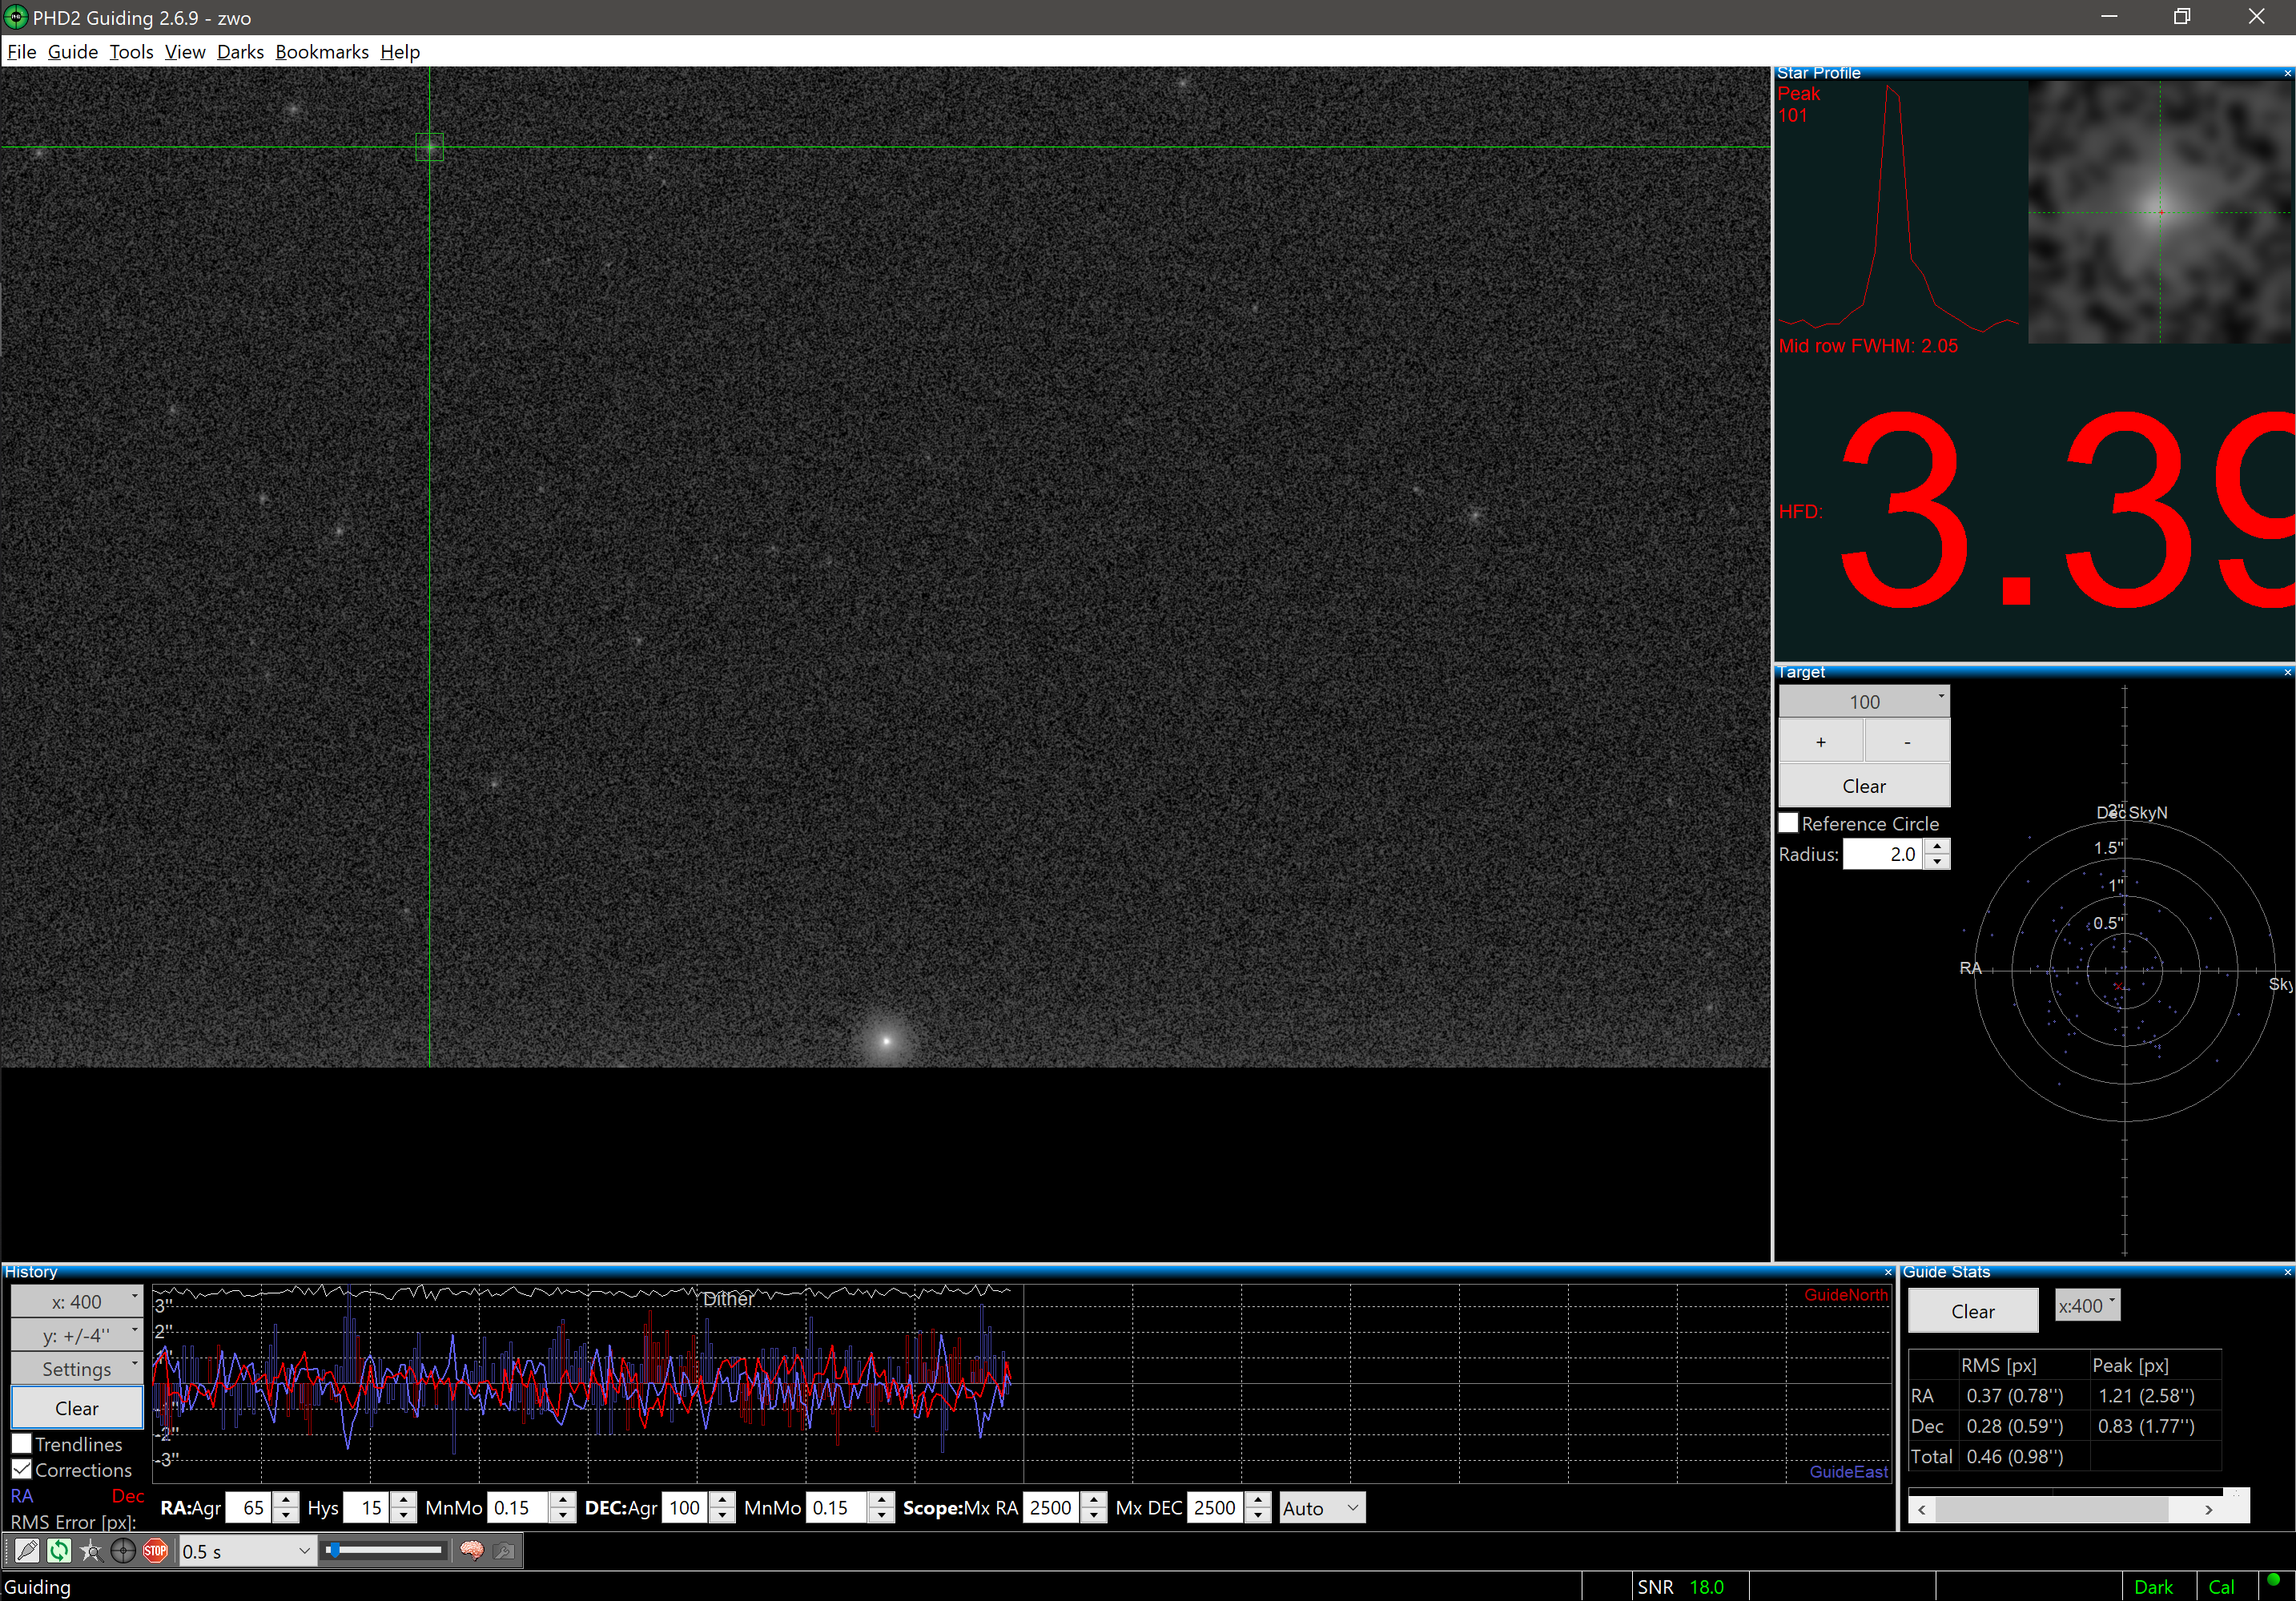
PHD2 provides rich information on accuracy and activity of your auto-guider. I’ve gotten my best image results when my total RMS error stays at 1.5" or less. I try not to tweak other settings too much, but if I am seeing consistent under or over correction I will try adjusting aggression and hysterisis settings to control it. I let PHD do the guide star selection for me.
The only thing left to do then is kill some time and keep half an eye on things to make sure nothing goes wrong (such as a meridian flip, which I still regularly have issues with). I’ll generally also take some additional dark frames once I’m done with lights (even if I got some earlier, getting a second set later on will help control for temperature differences across the night).
Next, processing the data!